Hello crafty friends, Jessie here to share a couple of cards I made for the elders in a nursing home. They are people who have no family and live alone. A nice girl in a FB group organized this event to send homemade cards to them to comfort and cheer them up during Chinese New Year. I thought this is a wonderful chance to spread out our warm and cozy love to the elder.
 |
| Created by SummerCraftingFun |
Since Chinese New Year is around the corner, and these cards are for the elders, I wanted to make them very Chinese style.
For my first card, I used two stamp sets designed by a Taiwan's local shop called Sabelina. They made a few great Chinese Style clear stamps, which I love but are seldom used. I stamped some birds and flowers images on my card panel with MFT black hybrid ink pad, and then I water-colored the images with Kuretake Gansai Tambi watercolor 24 color set. After that I stamped Happy Chinese New Year image with versa mark ink, gold embossed with my heat gun.
 |
| Created by SummerCraftingFun |
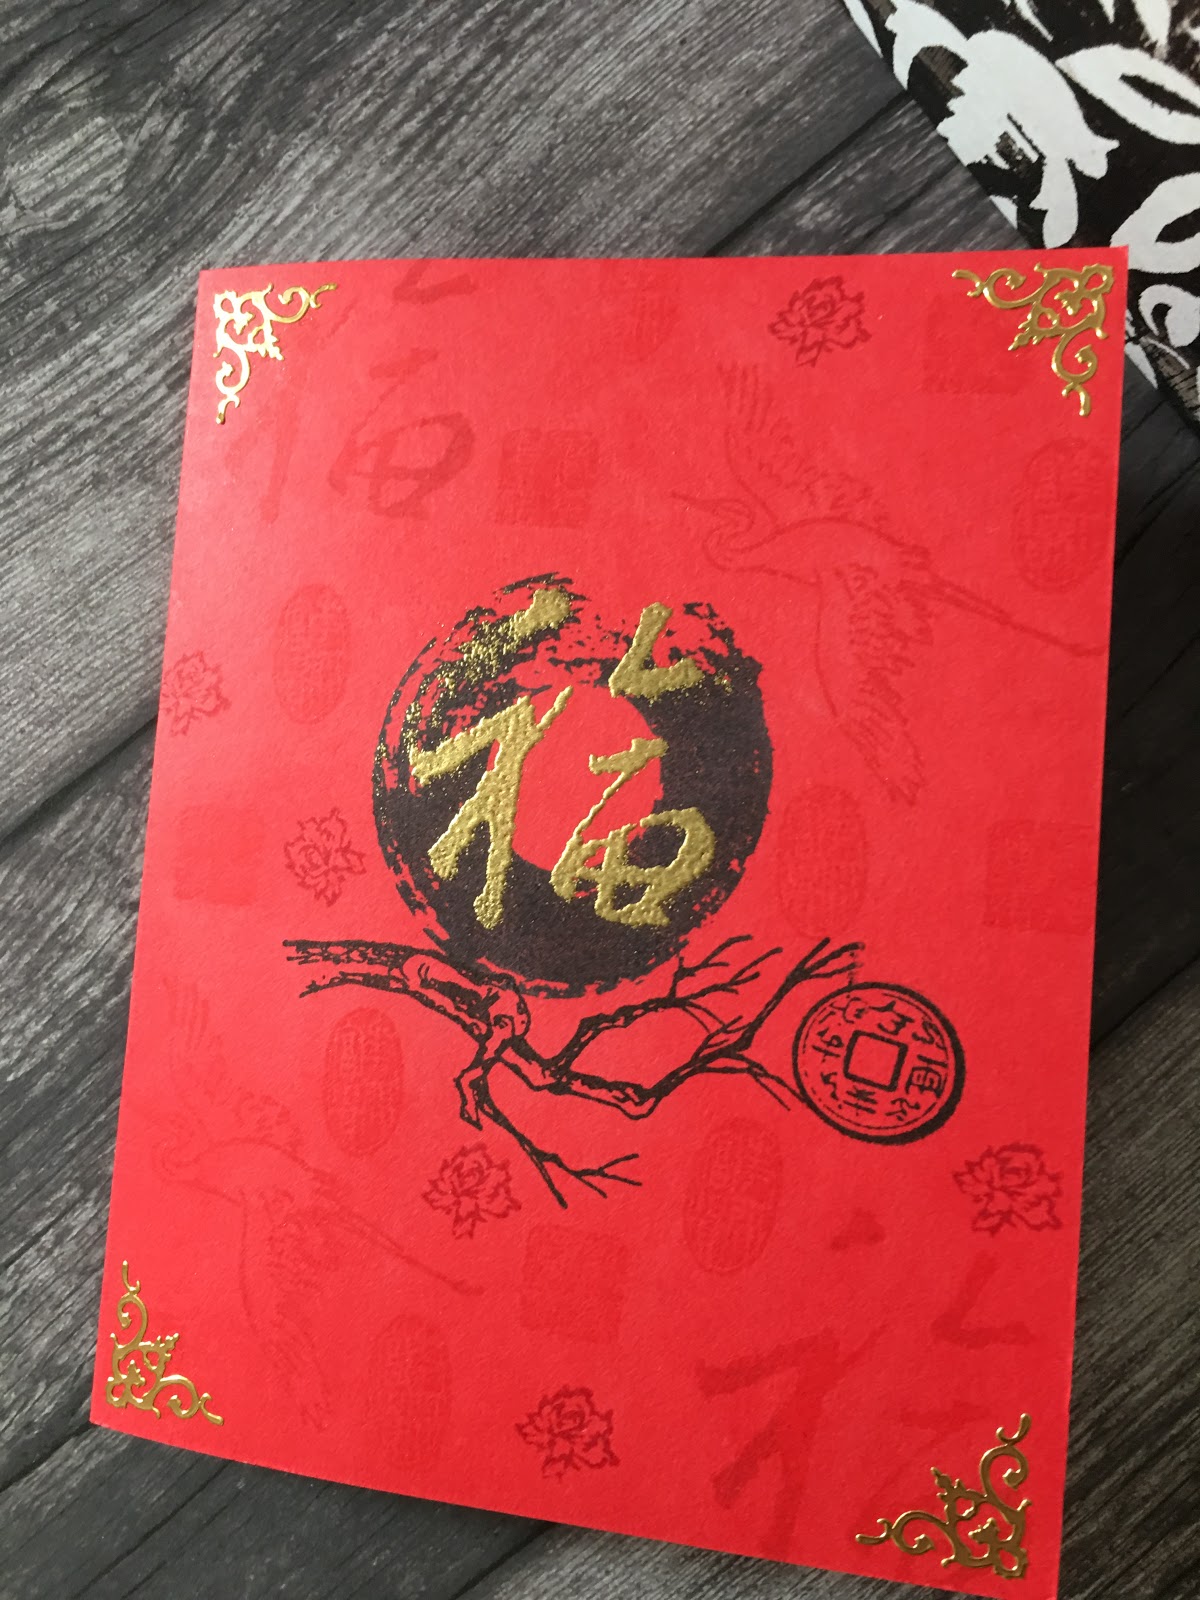
I used the same stamp sets to create my second card. I stamped the central image with versa mark ink on my red card base directly, gold embossed with my heat tool. And then I continued stamping with versa mark ink.
 |
| Created by SummerCraftingFun |
 |
| Created by SummerCraftingFun |
I also stamped some teeny tiny roses with my PTI Pure Poppy ink pad to make some tone on tone effect.
 |
| Created by SummerCraftingFun |
And my last card took me the most time to design. I spent about 3-4 days to create the whole card from start to finish.
I used my silhouette cameo to design the image and cut it out. And because I'm not so good at using my cameo, the cut-out image was actually not what I wanted at the beginning. I decided to keep going and see what I'll come up with. Here's what I ended up with.
 |
| Created by SummerCraftingFun |
It ended up as my favorite one. I backed it with a piece of glitter cardstock, embellished with a few flat back pearls and gold paint marker along the circle. I then glued the cut-out to a 4.25" by 4.25" pattern paper from Basic Grey.
 |
| Created by SummerCraftingFun |
I layered a piece of red cardstock inside my card base, embellished with gold stickers at the 4 corner.
 |
| Created by SummerCraftingFun |
I hope you enjoy my cards. Thanks for stopping by. Happy New Year and Happy Chinese New Year!
Love
Jessie
*******************************************************************
今天要跟大家分享幾張賀年卡。彩印在台灣的朋友發起送愛心到老人之家的活動,以150張手作的賀年卡片為目標請大家自由認領數量,然後再寄給老人之家。因為希望能參與這個有意義的活動,加上剛好處於工作遇到一些挫折及創作低潮,也希望能藉此慢慢恢復手作抒壓的目的,不敢貪多,只認領了三張。
這幾張卡片的設計是基於中國傳統春節,送卡片的對象是老人,所以設計的方向偏向中國風。第一張是利用莎貝麗娜的中國風水晶章,先在中間留下"恭賀新禧"的空間,可以利用2H鉛筆先大致留好位置後蓋印,蓋好圖案之後以水彩上色,這裡要注意蓋用印的印台要用防水的,不然水彩一上圖案就會糊掉。市面上適合水彩用的印台有Staze On油性印台, Archival防水印台, Hybrid防水印台,我用的是MFT家的Hybrid印台。
用吳竹的24色水彩上色之後,用浮水印台在卡片中間蓋上"新年賀禧"的圖案,撒上金色的燙凸粉加熱燙凸。
 |
| Created by SummerCraftingFun |
第二張卡片也是用莎貝莉娜的水晶章。這一次先把中間的"福"蓋好後燙凸,再以浮水印台蓋其他的圖案。這次不燙凸,純粹做浮水印的效果,期間點綴幾朵紅色的小花,免得整張卡片太平淡。在卡紙上以與卡片同顏色(或接近色)的印台蓋印的方式就叫tone on tone.
 |
| Created by SummerCraftingFun |
最後以金質貼紙在卡片的角落點綴一下就完成了。
第三張卡片是我花最多時間做的卡片,從設計到完成大概花了3-4天。一開始就設定要搬出很久沒使用的切割機(silhouette cameo),先goole一下公雞的圖案,找了幾個喜歡的圖來備用。在cameo軟體上設計好大致的圖案後,把圖案用紅色的卡紙切割下來。
其實因為很久沒用切割機了,在設計的時候沒注意到一些細節,等圖案切出來後才發現切割的效果不是我想要的,但秉持著不浪費的想法,切都切了,繼續接著做看看,不滿意再說。於是最後的成品變成這樣。
 |
| Created by SummerCraftingFun |
熟悉cameo的人大概可以發現我一開始的設計是除了圖案的輪廓之外還想要把細節都切出來的,可惜設定錯誤所以切出來的只有輪廓了~~~~囧 本來是想要修改後重切一次的,奈何工程浩大,時間有限,於是只好將錯就錯了。
 |
| Created by SummerCraftingFun |
總之感謝彩印在台灣的同好發起這個有意義的活動,就藉這幾張卡片祝賀大家2017年心安平安,順心如意。