顯示具有 Tim Holtz 標籤的文章。 顯示所有文章

2016年7月31日 星期日

Card Making / Monochromatic Stamping using Atlenew Stamps

Hello crafty friends, It's been sooooooo HOT in Taiwan recently. We got 35-37 degree Celsius everyday in these past two weeks.  Anyway, thanks to the greatest invention last century -- AIR CONDITIONERS.  I can't live without it. XD.  

I'd like to share a couple of cards I made following a great tutorial video made by Yana Smakula. You can see the video here. I just love how those card came out, so beautiful.


Supplies:

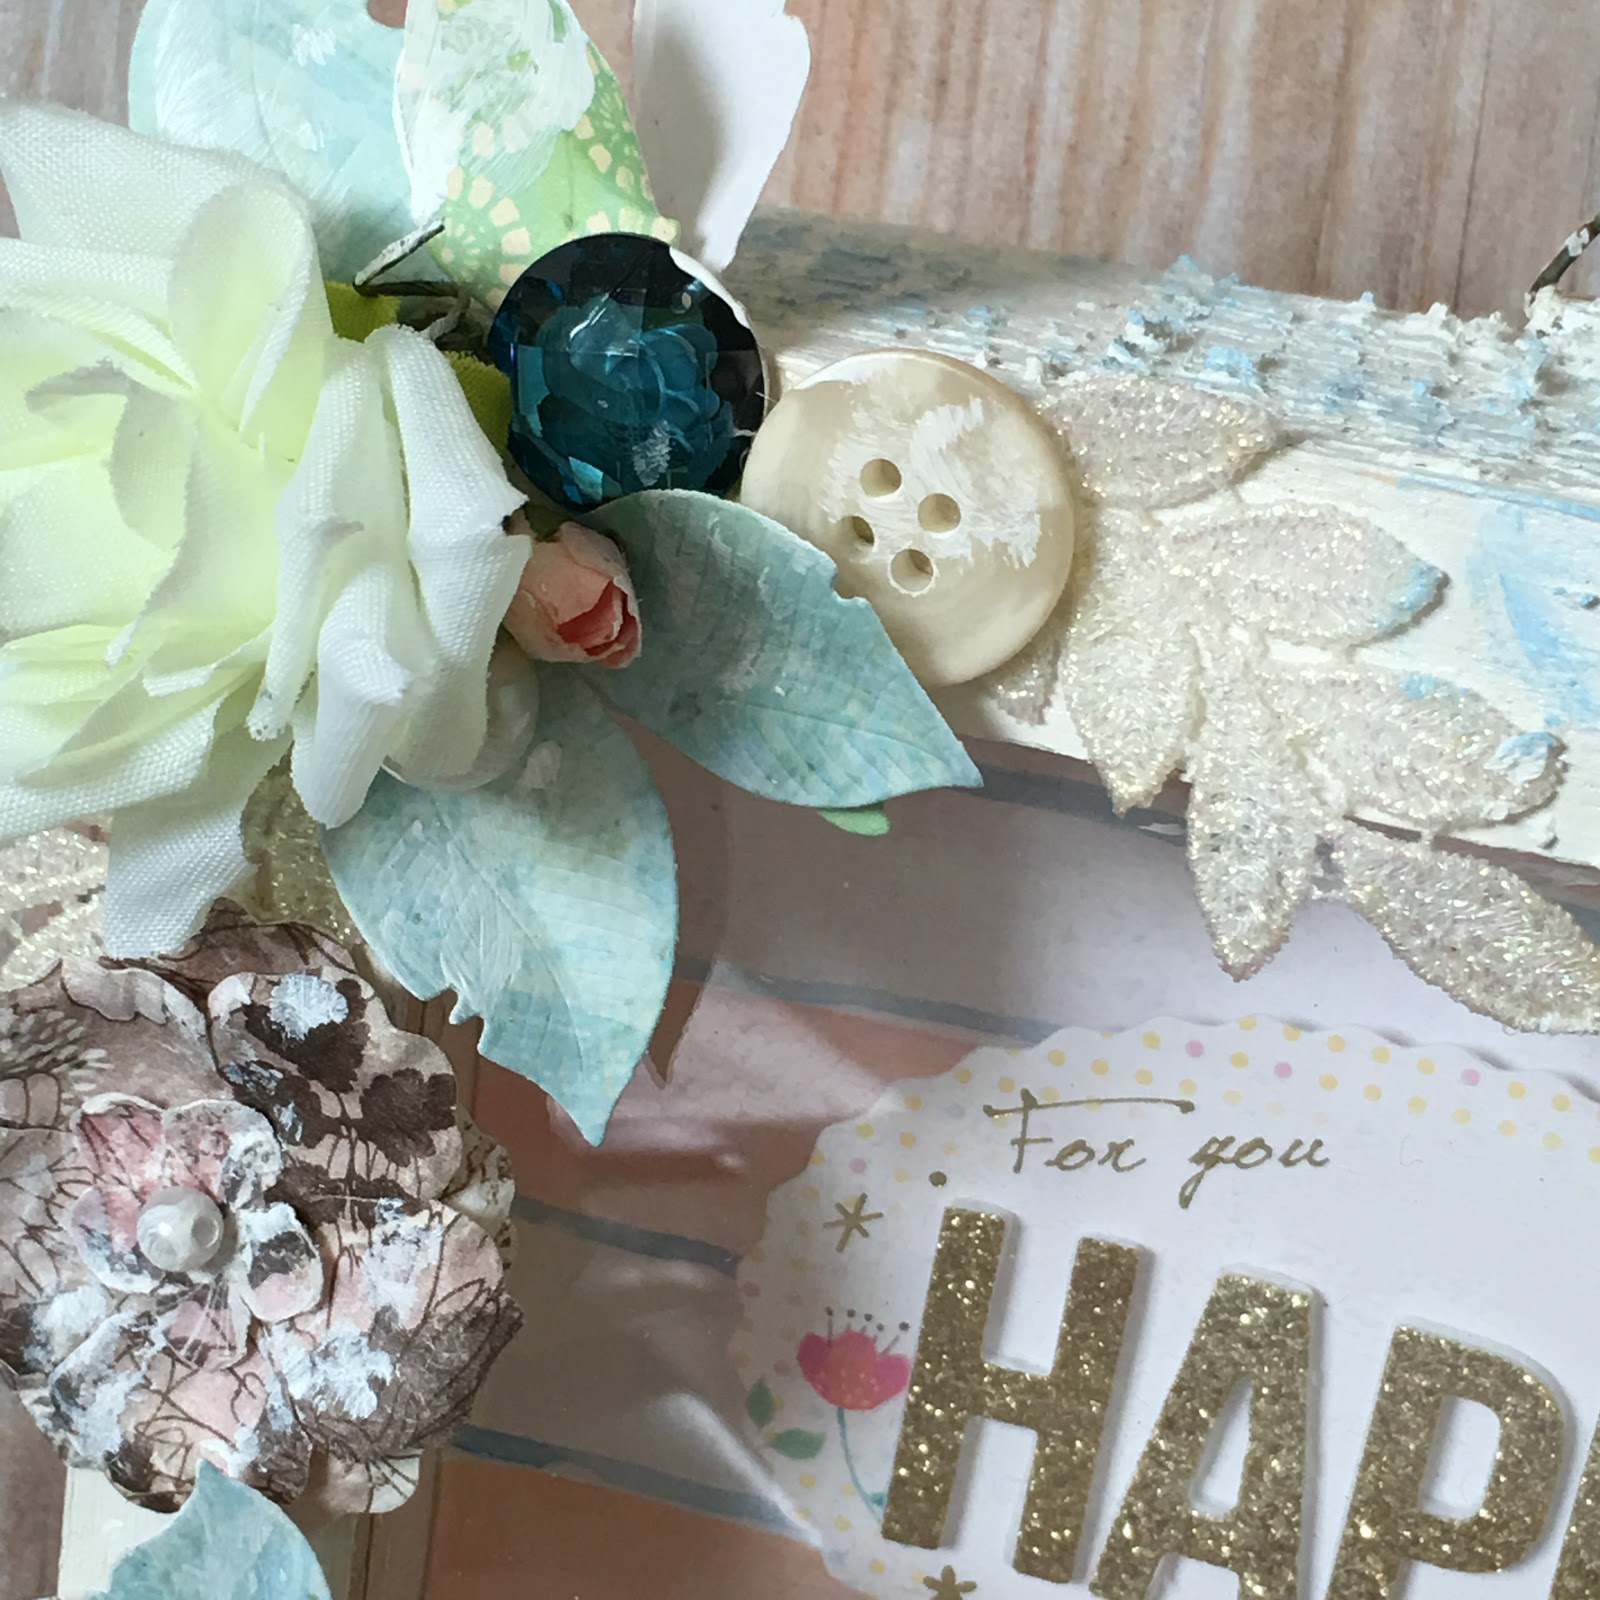
Stamp: Beautiful Day from Altenew, Garden Gild and Wet Paint from Papertrey Ink
Inks: Sweet Blush, Hibscus Burst, Rasberry Fizz, Lemon Tart, Harvest Gold, Summer Sunrise from PTI; Versa Mark Ink; Bundle Sage, Sahbby Shutter, Cracked Pistachio from Distressed Ink by Tim Holtz; Unicorn pigment ink from Hero Arts
Others: gold embossing powder from Hero Arts, Liquid Platinum embossing powder from Ranger; scallop rectangle die  from Mama Elephant


*********************************************************************************
天氣熱得人都懶洋洋的,好不容易抓了個空檔做了幾張卡片。這幾張卡片是照著我最喜歡的彩印人之一 Yana Smakula 的教學影片做的,有興趣的人可以點鏈接去看看。

我用的花草印章是來自Altenew的Beautiful Day. 我非常喜歡這組印章,最近的幾個作品幾乎都是用了這個印章組做的,除了Beautifl Day之外,它家最有名的印章應該就是玫瑰印章了,各種美麗還有搭配的刀模可以使用,非常方便。我通常是一次蓋滿整張卡紙,用刀模切下來當作配件使用,不管是做卡片還是相片美編,甚至是flip books 和物品改造都很好用。

字章是來自我的愛牌 Papertrey Ink家的印章刀模組,叫做Garden Gild. 這一個套組內含了印章, 刀模, 美編紙非常非常划算,是CP值很高的迷你套組,如果想入手Papertrey Ink家的東西的話,這一組超值推薦! 

(這絕不是勸敗來著! 囧)

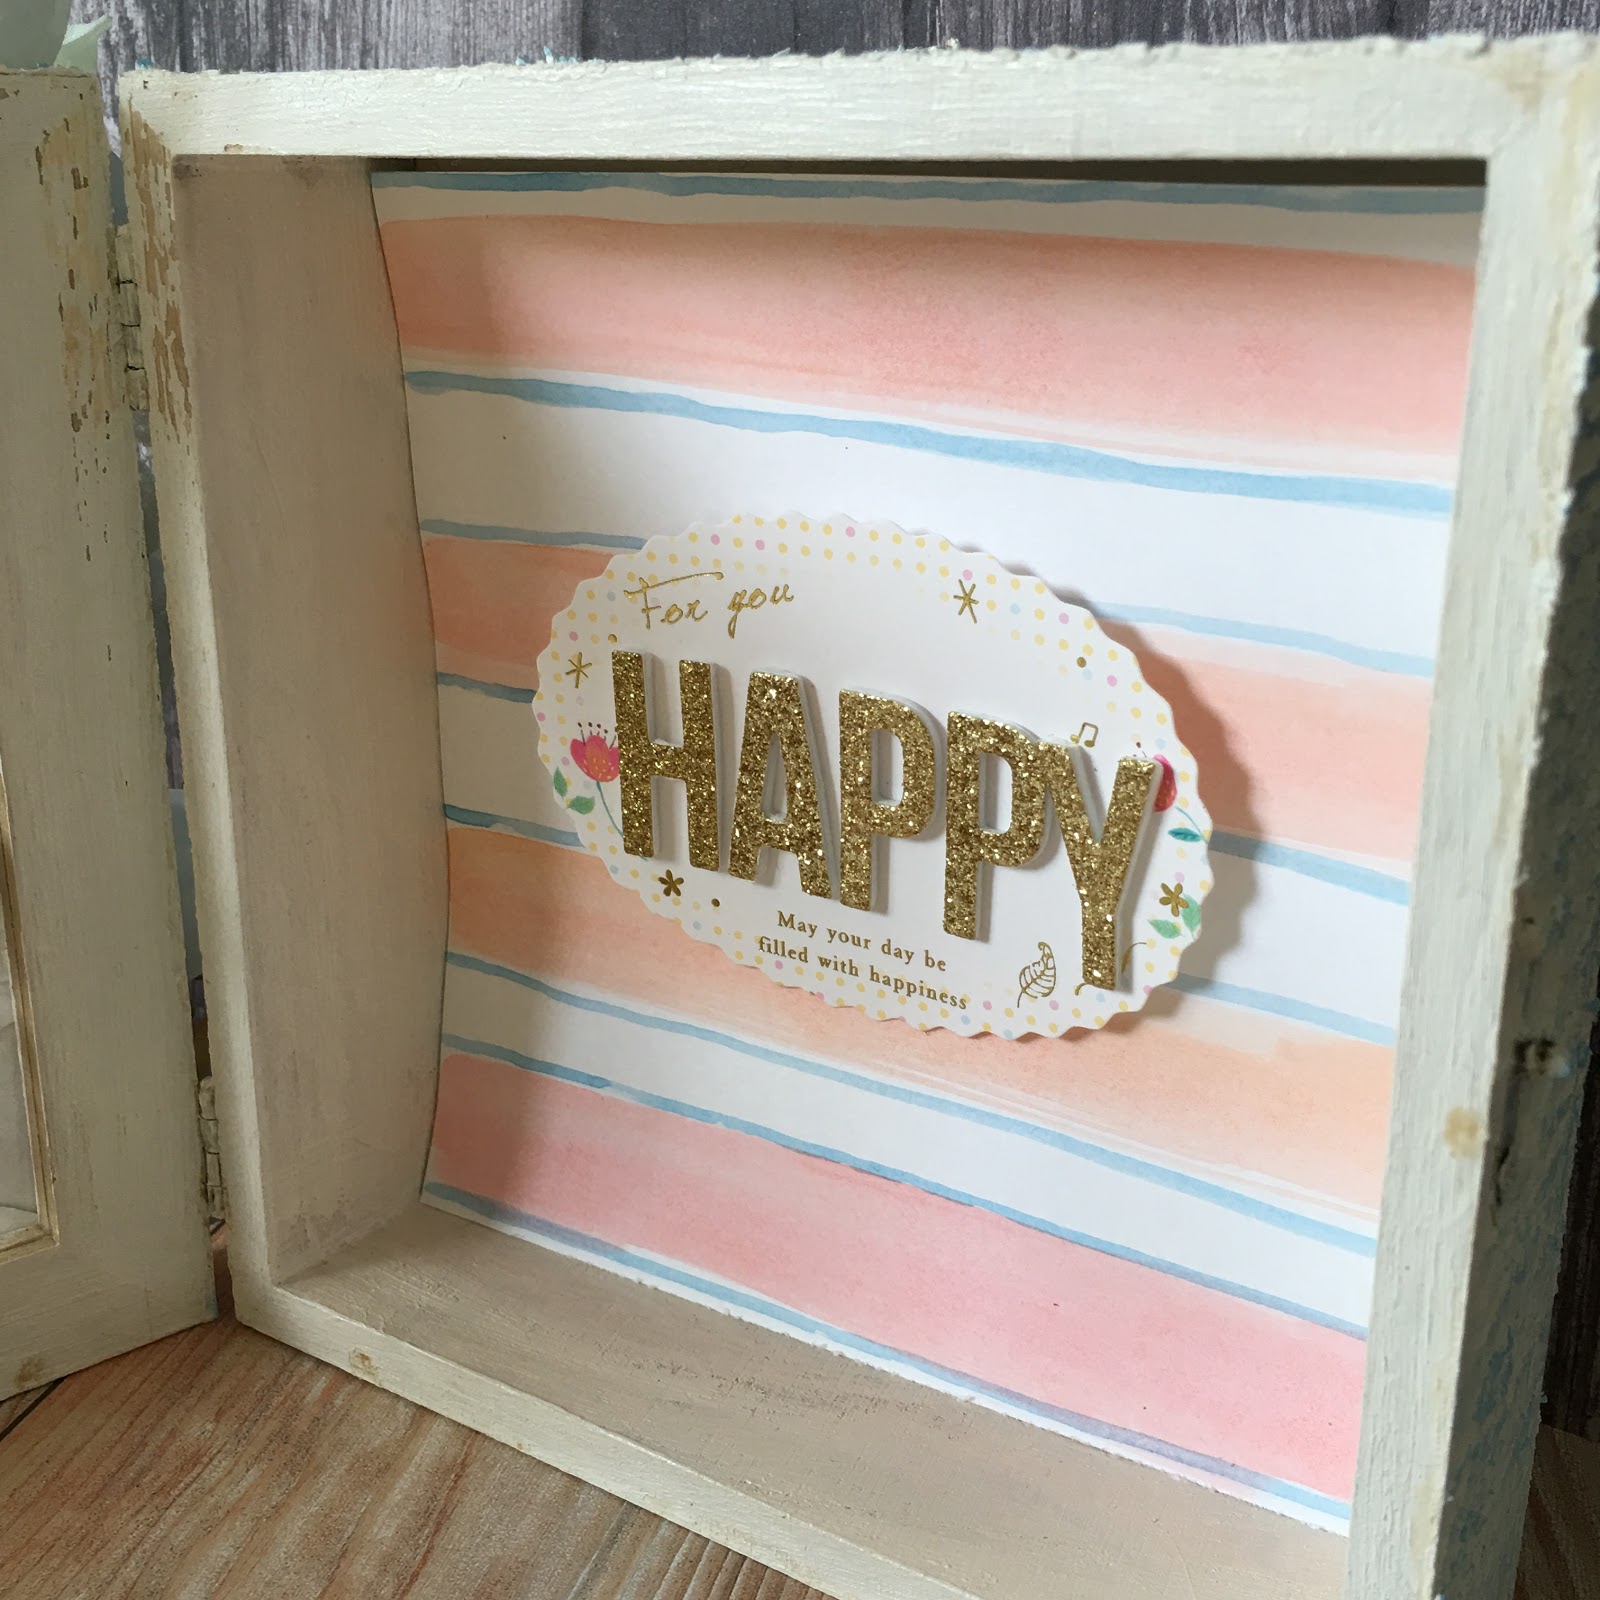
下面幾張照片就是用Garden Gild印章組做的卡片。


本部落格裏除了另外註明照片或影片來源的資源,其他使用在部落格中的照片或影片均為我自己拍攝及製作的,版權所有,請勿任意使用或拷貝。

2016年5月11日 星期三

Project share / Altered Frame Box 改造相框

    Hello crafty friends, I hope that you all had a great Mother's Day. My mom had a trip to Kenting, which is one of the most popular traveling spots in Taiwan, during the weekend with her siblings. 

    I joined a Facebook group challenge hosted by very talented Meihshia (blog link here) this month. We'll have to create a piece of mixed media, a piece of painting and brush lettering every week. For the first mixed media project, we'll have to make a piece of home decor that uses paints, metals, fabric and paper.


    Here's the project I created. I altered a frame box and turned it into a home decor.


    I started off with painting a coat of white gesso, and then a coat of antique white acrylic paint. After it dried, I used a Tim Holtz's stencil and home-made modeling paste to create some texture on the surface.  After it dried, I painted with blue acrylic paint to add some color and gave it a bit of shabby chic style.


    For inside the box, I cut a piece of watercolor cardstock that just fit inside of the box and drew some stripes with pink and blue watercolor.


    To decorate the box, I used metal charms, fabric leaf, paper flowers and leaves, gem, button and felt.


Hope you like this project.


LOVE


*****************************************************************
Hello, 上個週末是母親節,不知大家是否有給自己和媽媽一個難忘的節日呢?我媽媽和我幾個舅舅阿姨組成一團跑到墾丁去玩了,我反而落了個清閒。(當然是有提前慶祝囉~)於是利用週末來趕作業。

5月份我參加了由Mui在臉書上舉辦的活動,每週要交一份多媒材作品,一份畫畫作品還有最近很夯的英文花體字的練習作業。5月份每週都要交作品,因此這個月會很多采多姿啦~~

第一週的多媒材作品要利用顏料,金屬,布料,紙張等這些東元素來製作一個擺飾,完成的作品可以放在家裏當裝飾品。我選了一個中間挖空還可以打開的木盒來改造。

首先利用白色打底劑(Gesso)將木盒都刷過一遍,乾了之後再刷一層復古白色的壓克力顏料。等顏料也乾了之後,我用型板+自製的塑型膏來增加一些紋路和層次感。這個刷打底劑,顏料和塑型膏等乾燥的過程可以用熱風槍來加速乾燥;我一般都是讓它自然乾,因為製作的過程當中有時候還沒有靈感和明確的想法,所以乾脆慢慢來~~~~  XD

等木盒準備好後,剩下的就是裝飾啦。因為想把這個作品當作擺飾用,所以盒子內側我就簡單的裝飾一下,裁了一張水彩紙用粉色和藍色的水彩畫幾條條紋,然後拿一張書局買得到的小卡貼上去,再用字母刀模切出"Happy"的字母貼上去,然後整張水彩卡黏在盒子底部。水彩卡我沒有黏得很緊,主要是希望以後可以拆下來換其他的內裝。

至於盒子外側,就利用主題要求的一些元素來裝點,最後刷上一點白色壓克力顏料來製造一些輕復古風就完成了。


本部落格裏除了另外註明照片或影片來源的資源,其他使用在部落格中的照片或影片均為我自己拍攝及製作的,版權所有,請勿任意使用或拷貝。

2015年9月30日 星期三

Card making / A couple of cards to share

    Hello crafty friends, I hope you all have a wonderful weekend. I've been quite busy these days, but I finally got some time to make cards! Yay! 

    I have a couple of cards to share today. I love surfing on the internet to see talented crafters' projects and learn some tricks and tips or great ideas from them. I cased some cards that really inspired me with a little bit twist. You can see those cards here, here and here


    For the first card, I used a mama elephant stamp set called Free Style Florals. I stamped some flowers and leaves on a white cardstock, did some copic coloring, and then fussy cut them out. I made my own background pattern paper with a  "thankful" image from Studio Calico using Fog dye ink from Simon Says Stamp. And then I assembled my flowers and leaves with some glue and pop dots. Finished off my card with some gold sequins.

A Thankful Heart Is A Happy Heart.
mama elephant, studio calico
 For the second card, I started off with stamping tomato image randomly using Berry Sorbet and New Leaf ink pads from PTI.  And then stamped some sentiments using Enchanted Evening and True Black ink from PTI as well. I rounded my card corner with my WRMK corner chomper, glued the card panel with an angle onto my cardbase. I then stamped a sentiment and withe embossed it on a black cardstock, and cut it off. Finishing off this card with Rock Candy stickle from Ranger. 


You Got This Smile!
Wplus9, Studio Calico


Awesome Star
MFT, WRMK, PTI, Studio Calico
    

   For the last one, I blended in Aqua Mist, Spring Rain ink pad with Tim Holtz mini blending tool. Die cut the panel with the stitched frame from MFT Blueprint 21#. And then I dry embossed the card front with a WRMK embossing folder.  Die cut some starts with MFT Stitched Stars die from pattern paper and vellum cardstock. I also cut "AWESOME" from a black cardstock using a Studio Calico die. I put everything together on my embossed card front, embellished with a blue button and some white sequins.


I hope you like my sharing today.


XOXO 

Summer

*****************************************************************************

    最近趁著放假的空檔做了幾張卡片,製作的靈感來自幾個很喜歡的作品,有興趣的人可以去看看這幾個作品。 herehere and here.

    第1張卡片我選了Yana 的作品。Yana是一個非常棒的彩印人,同時身兼好幾個品牌的設計團隊,像是大家熟悉的Hero Arts, Spellbinders, Simon Says Stamps 及Altenew等。她的用色很摩登,非常具有現代感,我常覺得歐洲的彩印人使用的配色很有特色,相比起美國的彩印人來說,用色通常偏向大膽,鮮豔,具有強烈的現代感的配色; 我個人很喜歡這種配色,去年剛接觸到Yana的作品時簡直太開心了。說到配色的大膽,同樣是喜歡使用黑色的Amy Tangerine,她的作品裡的黑色是溫柔的,有童趣的感覺,而我非常欣賞的另一位歐洲彩印人Nanant的作品呈現的黑色便非常有強烈的視覺衝擊,但又不具攻擊性,很有畫龍點睛的效果   (歪樓了......囧)

   我用了mama elephant的印章蓋了花朵和樹葉,用copic markers上色,然後剪下來備用 (係地,人客妳沒看錯,用剪刀剪下來的,這組印章有搭配的刀模,但我沒買到......囧,只好回歸原始的手工剪)。選個字章用Simom最淺的灰色 fog印台蓋滿整張卡紙,然後把剛才剪下來的花草樹葉拼貼在卡紙上,再貼到底紙上就完成了。

    第2張卡片是看了這個作品之後依樣畫葫蘆case了一張卡片。我用了Wplu9同系列的番茄印章蓋在卡紙上,然後一樣挑了幾個字章直接蓋在番茄上,然後貼到A2尺寸的卡紙上就好了。很簡單的設計,但是非常漂亮! 這張卡片的重點是自製的背景紙要用實心的印章(Peggy老師說咱們要有文化一點,這種實心的印章叫做陰刻章),然後蓋在上面的字章不要太複雜,我試了幾種顏色之後,個人覺得字章用黑色的印台來蓋效果最好。 PS: 我case的這張卡片還有另一個版本,也非常漂亮喔!

    最後一張卡片是從這張卡片得來的靈感。我挑了兩種藍色用海綿刷棒刷色,然後用MFT的購圖小物21#裏的長方形縫線刀模切出逢線邊框,再用WRMK的凹凸版壓出山形紋路。用MFT的星形縫線刀模切美編紙和水晶卡,再用Studio Calico的字形刀模切黑色的卡紙,最後把剛切好的小物拼拼湊湊,再點綴幾個亮片,完成!

    
    題外話,不知道大家有沒有這種經驗啊,很多彩印產品和技法都是從國外來的,在紀錄卡片製作過程的時候總會碰上不知道如何翻譯和稱呼的情況,搞得po個文還要到處去翻找有進這些產品的國內一些商家的平台,免得產生雞同鴨講不知所云的烏龍,難怪我的po文老是難產啊~~~~~~~

2015年4月6日 星期一

Card Making / Thank You

Here comes the third card that I would like share today.

It's a one layer card with lots of embellishments on it.


I started off with making my card base. I used a large cling stamp inking with some distress inks, spritz with some water and then stamped on my A2 card base directly. 
Then set aside to let dry. Of course, if you're impatient just like me......
Please use your heat tool to fasten the process :-)


I layered with some cut files cut by my cameo using Wilna's cut files, 
paper flowers, some die cuts by PTI. 
Then I brushed some gesso on my flower to tone down the bright red color.
Finally, I spritz some perfect pearl mixture on the card to give it some shimmer as my finishing touch.


Supplies
Paper: Stamper's Select White cardstock
Ink: Broken China, Squeezed Lemonade, Worn Lipstick, Shabby Shutters
Stamp: Papillon by Tim Holtz
Die: Scribbles, Wet Paint by PTI
Others: flower, strawberry from my stash


---------------------------------------------

我今天有夠勤奮的

這張卡片寫完之後還有第4張卡片

這一張很簡單,用了單層卡片,上面堆疊一些小物做裝飾


首先先準備底卡
拿一片比較大的印章或背景印章,我是用Tim Holtz的Papillon印章
拍上不同顏色的復古印台
然後噴上一些水,不要太多,免得印章的圖案糊掉
然後把印章蓋在卡紙上,放到一邊等它乾

當然啦,妳要是沒耐性等它乾,那就吹乾吧


裝飾的部份我用了好些刀模和設計
首先是花朵與葉子
這是之前用卡密歐一次切好,用水彩上好色,用不完的收起來以後用


背後圓圈圈的圖案和文字是用Papertrey Ink家的刀模
圓圈圈圖案切好後用水彩上色
文字是用copic marker上色的,特意上成漸層的感覺
因為是用馬克筆上色的,可以控制漸層的效果


然後加一些紙花增加效果
紙花用gesso刷白,這樣才不會太紅跟其它的顏色搭不起來
又可以增加不同層次的顏色


最後,噴上用perfect pearl和水混合的噴瓶
給卡片增加一點閃亮亮的低調美感


本部落格裏除了另外註明照片或影片來源的資源,其他使用在部落格中的照片或影片均為我自己拍攝及製作的,版權所有,請勿任意使用或拷貝。

Card Making / Thanks

Hello, me again. In this post I'm sharing another card I made.


In this card I used Betsy Veldman's Technique called "smooshing" . 
I saw the technique on Papertrey Ink's Monday Challenge Vedio on youtube.
Betsy is a super talented paper crafter. I love her designs for Papertrey Ink. 
I really admire her uses of color and tastes on card making.
If you don't know her, you should definitely head onto Betsy's blog.


It's a very fun technique to make your own background.
Combining with some Maggie Holme and Heidi Swapp's products, the card was done.


Supplies
Paper: Stamper's Select White cardstock from PTI, watercolor cardstock
Inks: Wild Honey, Spun Sugar, Shaded Lilac and Salty Ocean from Tim Holtz Distress Ink
Others: Ephemeras from Open Book by Maggie Holme and September Sky by Heidi Swapp, sequins, gems.


-----------------------------------------------


今天要跟大家介紹一位我超喜歡的彩印人: Betsy Veldman。


她是印章公司 Papertrey Ink 的主力設計師之一
在去年一年裡更是推出了好幾套限量的印章和刀模
我最喜歡的是她對色彩的運用
她的卡片常呈現出一種溫暖,愉悅,多采多姿的感覺
她跟另一位PTI的設計師 Danielle Flanders是我最喜歡的三位設計師之中的兩位
另一個設計師 Laura Bassen會在以後介紹


Betsy Veldman 和 Danielle Flanders兩人的卡片風格都是簡單乾淨,明亮
但是在媒材的運用上又有不同
Danielle很會運用美編紙和一些圖卡,刀模來做簡潔的卡片
她的卡片有時候甚至不需要用到印章


而Betsy則是運用印章和印台的組合搭配出很多超棒的卡片
她對刀模的運用也很有創意


也喜歡Clean and Simple卡片風格的人可以點上面的鏈接去看看喔!


.
.
.
.
.
.
.
.
話說回來,好像漏了什麼??
.
.
.
.
.
.

忘了跟大家介紹一下這張卡片的作法了
哈哈哈哈哈哈


(別K我啦~~~)


這張卡片就是用了Betsy Veldman的水彩技法
其實也不是多新的技法
但是看她在運用的時候就會覺得很簡單,很容易上手


首先準備一張透明塑膠片,塑膠袋,壓克力塊什麼的都可以
經過幾次試驗之後,我個人比較喜歡Betsy示範的作法


拿一張跟水彩紙大小一樣或大一點的透明塑膠片
拍上幾個喜歡的復古印台,水性印台也可以
然後噴一些水在透明片上,水分不要太多,只要讓顏色充分沾濕就好
然後蓋在水彩紙上


因為是把透明片蓋在紙上,所以可以清楚看到色彩的流動
比起Tim Holtz把顏色擦在矽膠墊,然後把卡紙覆蓋上去的作法更清楚
這時要注意顏色的流動
如果水分噴得不夠多,顏色就不會流動
但是水太多的話,顏色就會融在一起變成不乾淨的顏色了


背景準備好後放一邊晾乾


係地,人客哪系某耐性,耶賽嘎吹風機,不是,熱風槍客踹吹吼搭
(這句看得懂否?)


最後選一些搭配的圖卡,紙花,亮片,水鑽......  堆上去就是了
很有美感地排列
卡片就完成啦!!!


系恩系揪甘丹耶!


2015年1月3日 星期六

Projects / Altered Cereal Box 改造麥片盒

Hello crafty friends, I hope that you all have a great weekend! I'm popping in to share a project I made a while ago. I saw a YouTube video showed a project of altering a cereal box. I was so inspired that I decided I have to make one.

This is the front of the cabinet.

Crafting fun


This is the inside of the cabinet when you open it.


Down below are some pictures of the details of the cabinet.


The birdcage was using Tim Holtz's die.


This angel was altered from a Christmas embellishment.


I used gesso over the little guy, when dried, I painted it with white acrylic paint. Then I used homemade modeling paste over it. Done!


I handmade almost all the flowers using the technique I learned form Youtube as well.


Here's the back of the cabinet.


I put some washi tapes, wood-mount stamps, handecarved stamp inside.


If you're interested in this project and want to make one yourself, the lady also had a ustream tutorial.

Here's the link to the tutorial video.


----------------------------------------------------------

今天要跟大家分享一個我之前的作品
我在YouTube上看到的作法,是用剩下的喜瑞兒空盒改造的
因為實在太漂亮了,忍不住手癢也做了一個


封面上的裝飾品幾乎都是自己做的


鳥籠是用Tim Holtz的刀模切割後
刷上一層gesso打底


邱比特是用現成的聖誕節裝飾品改造的
原品是塑膠製品,我先刷了兩三層gesso
等乾了以後又刷了一層白色的壓克力漆
然後再刷一層自製的modeling paste


紙花和麻布花也是看影片後自己照著做的


原創作者有教學影片,有點長但是很詳細
有興趣的人可以點進去上面的連結看一下